Below are this weeks pictures from New Nandagram, with more thorough descriptions below the slideshow:
This slideshow requires JavaScript.
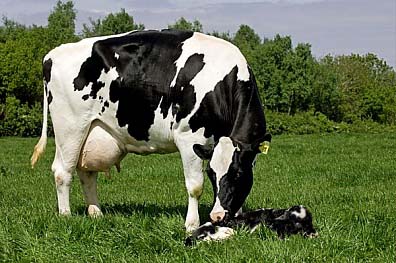
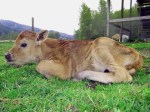
1.-4. We had to keep the cows in the goshalla and a small paddock over the winter because if we let them on the pasture, they turn it to mud. It wasn’t really dry enough to let them out, but it was mid-April and they are usually out by the beginning of April. I’m always careful to check on them when they change feed suddenly–in this case from hay to grass, but they did fine. I thought they’d run and buck when they got out, but they just dove into the grass and couldn’t graze fast enough. Our neighbor lets us use his 5 acre pasture and because it is mostly canary grass, we let them there first.
7. Morel mushrooms appear at this time of year. They are hard to see because they blend in with their surroundings, but I understand people can train themselves to be able to spot them readily. I didn’t harvest these, primarily because they are growing in a place where I know they spray Roundup every year. I also personally don’t care for the taste of mushrooms, although I understand that Srila Prabhupada enjoyed them.
8.-11. It is time to harvest nettles, a common plant in our forest. Nettles are easy to identify because if you accidental touch them, they sting severely. However they are a healthy and delicious vegetable when prepared like spinach and when dried make a pleasant tea, particularly when mixed with mint. Nettles do have some mild medicinal value as an antihistamine, but we harvest them more as a food and a tea.
13. Billy was suffering from acid reflux, and a tea made from the root of the avens weed gave him immediate relief. This is the time of year to harvest avens root. After thoroughly cleaning the roots, they can be dehydrated and used to make tea. They have a spicy flavor, something like cloves.
16. and 17. Last year I started my seeds in a mixture of potting soil and peat and was dismayed with abysmal results in spite of providing great conditions for germination and growth. This year when I started my first flats in the incubator with pure peat from the same bale as last year and although the seeds germinated, they failed to grow, even after 2 weeks of careful care. I developed an experiment to determine if the peat was contaminated with the herbicide 2.4D. After one week, my experiment has some preliminary results. The growth on both the monocots and the dicots was very stunted from the seeds grown in the peat compared to garden soil. Because the dicots (wheat) were also stunted, I can conclude that the culprit was not 2,4D, but rather something else. I did run into a friend in town and mentioned the experiment and she’d also had trouble starting seeds in a potting soil/peat mix last year. She was so disappointed with the stunted growth that she didn’t start any seeds this year, never suspecting the peat.
From April 14, 2017: We’re very concerned about what is happening with starting seeds in our seed incubator. Last year I had a difficult time getting seedlings to grow and attributed the problem to a willow tree growing on the north side of the greenhouse that had partially covered the top of the greenhouse. This winter we removed the offending limbs so I was dismayed when we seem to be having the same problem in spite of having almost ideal conditions both within the incubator at night and in the greenhouse during the day. The seeds will germinate, but they fail to grow.
I’m beginning to suspect that the peat moss that I start the seeds in is contaminated with 2,4-Dichlorophenoxyacetic acid (2,4D), a common herbicide that is used to kill trees. The bale of peat that I have has some chipped wood in it which may have been treated with the poison. So I’ve devised an experiment which will determine if I’m correct. 2,4D only affects dicots, plants with broad leaves. Monocots which are grasses including grains are unaffected. I’m going to plant 4 pots and start seeds from monocots in 2 of them and dicots in 2 of them. One of the monocot pots will have the suspect peat as the medium and one of the dicot pots will have peat as the medium. The other 2 pots will be started with regular garden soil devoid of any suspect peat. Of the 4 pots:
- one with monocot (wheat) seeds in suspect peat
- one with monocot (wheat) seeds in garden soil
- one with dicot (sprouting mix including alfalfa) in suspect peat
- one with dicot (sprouting min including alfalfa) in garden soil
If I’m right, the wheat seeds grown in the suspect peat will flourish, but the alfalfa grown in the peat will fail. Both the garden soil seeds should be fine. We’ll have the answer next week. Stay tuned!
This week’s photos with more detail below:
This slideshow requires JavaScript.
1. and 2. I was dismayed that the seeds I started on March 22 germinated just fine, but failed to grow. Normally 2 weeks after sprouting, these tomato and lettuce plants would have their first true leaves. These plants have had ideal growing conditions: in the greenhouse during the day and in the warm incubator (with a fan) at night. There is no excuse for this lack of enthusiasm!
3.,4. and 5. The experiment using monocots and dicots, peat and soil. We’ll see…
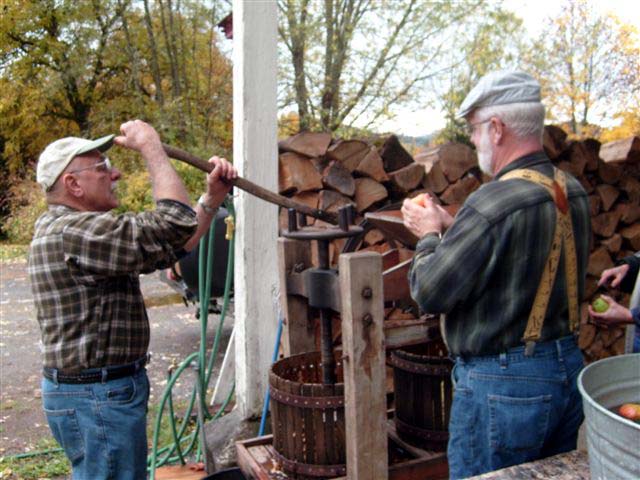
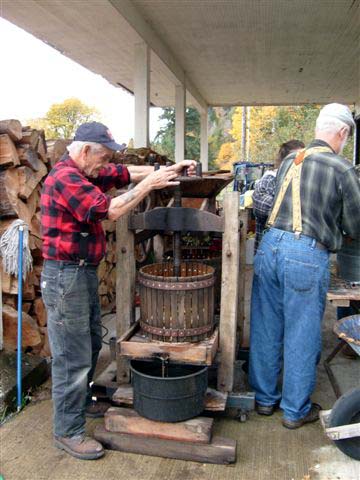
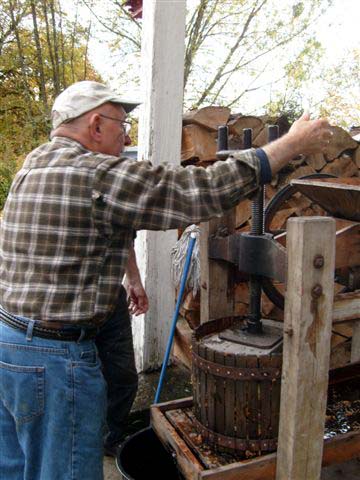
6. I made mozzarella with about 9 gallons of milk. This picture shows the cut curds being slowly heated to 98º F
7. The cooked curds culture at room temperature over night and then are ready to melt and stretch. I’ve found that if I freeze them at this stage I’ll get a completely fresh product when they’re defrosted and stretched. Mozzarella doesn’t keep as well as an aged cheese and needs to be offered within 10 days.
8. and 9. We got 3.5 lbs of ricotta cheese from the whey left over from the mozzarella and used it in pancakes, a creamy pasta sauce and some apple/walnut/ricotta bread (it’s cake, really).
10. We’ve been soaking Twasheek’s foot in an epsom salt bath to help draw out the infection. It may help a little, but he is still lame and infected. He’s been on antibiotics and pain meds for 3 weeks.
11. One of our biggest battles here is the battle of the morning glories. They send out runners that are like a freeway exchange in Los Angeles and want to take over the garden. This year I’ll be covering them with patty mats (cow manure mulch), but I thought I should get as many out as possible, first. While digging in the raised beds, I uncovered this monster. He’s a salamander and he was very lucky that I didn’t hurt him with the tools. I found him a nice damp hole after taking a selfie with him.
12. This is the number of morning glory runners I found in about a 4′ x 8′ section of garden. They are being relocated to a FEMA camp.
14. We have a wonderful walnut tree that didn’t produce any walnuts the first year we were here. I’ve been putting all the extra whey from cheese making on it and giving it cleaning from the horse stalls. I leave the horse stuff in piles to encourage worms and then after a few months, Billy spreads it around the tree. We’ve had great walnut crops the last few years. Hopefully our generous tree will give us another nice harvest this fall.
15. There is a wildlife area about 1/2 mile from our house where they release cage-raised pheasants every Friday in the fall so that hunters can come an shoot them. A few escape the hunters, but they’re usually prey to coyotes or eagles within a month or so. This guy has survived the winter and hangs with our chickens. He fights with the roosters and may be a baby-daddy for some of the chicks. If he survives much longer, we’ll probably give him a name.
16., 17. and 18. Willow bark tutorial: The first step is to identify a willow tree. This should be done the prior year because the bark should be harvested just as the leaves are coming out. In the winter, sapling sized trees all look alike. They have thin, alternate leaves and tend to prefer moist locations. We have several on our property. I recommend googling “willow tree identification” to become familiar with the types of willows. The willows growing in the swamp in the corner of Dee’s pasture have the strongest medicine, I’ve found.
Once you’ve positively identified a willow, find a newish branch that has a rubbery bark, rather than the thick, rough older bark. I use a potato peeler and peel of long strips from a clean(ish) area of the branch. If you collect the bark from all around the branch, you’ll kill the branch above where you took the bark, That’s not the end of the world for the willow because they love to send out new branches. I usually just harvest from one side of the branch, however.
Take your peeling strips and spread them out in a dry, airy location that is at least room temperature. When they’re crispy dry they can be stored in a sealed jar in a dark location and maintain potency for up to 2 years. Whenever I’m trying a new medicine, I take the precaution of taking a tiny amount and seeing if there is any adverse reaction.
For a headache or muscle ache I make a tea using as many strips as I think would make a heaped teaspoon if it were powdered. I simmer the strips in about 2 cups of water for about 10 minutes and let it cool. Then I strain and drink with a little honey to mask the astringent taste. That is equivalent to about 2 aspirin, depending on the strength of the particular willow.
For more weekly pictures from New Nandagram go to: https://newnandagramcowprotection.wordpress.com/
Posted in Uncategorized

 seemed to flow through the bazaar. The Indian guide with me told me, “our Prime Minister has been shot!”
 roundabout in front of the hotel. I ventured down to the lobby and asked the employees if they knew what to expect. Right about that time, I could hear the sound of breaking glass: someone had thrown a rock at a window and broken it. I looked at the unguarded door and had a realization: no one was prepared for this, and no one is getting the people here talking to one another so that they can respond appropriately to the crisis.
 The danger is not a disease that kills magnitudes fewer people than automobiles, but rather that the Powers that Be choose the Lame Story to disguise the fact that the economy had to collapse due to the National Deficit and the policy of Quantitive Easing.